
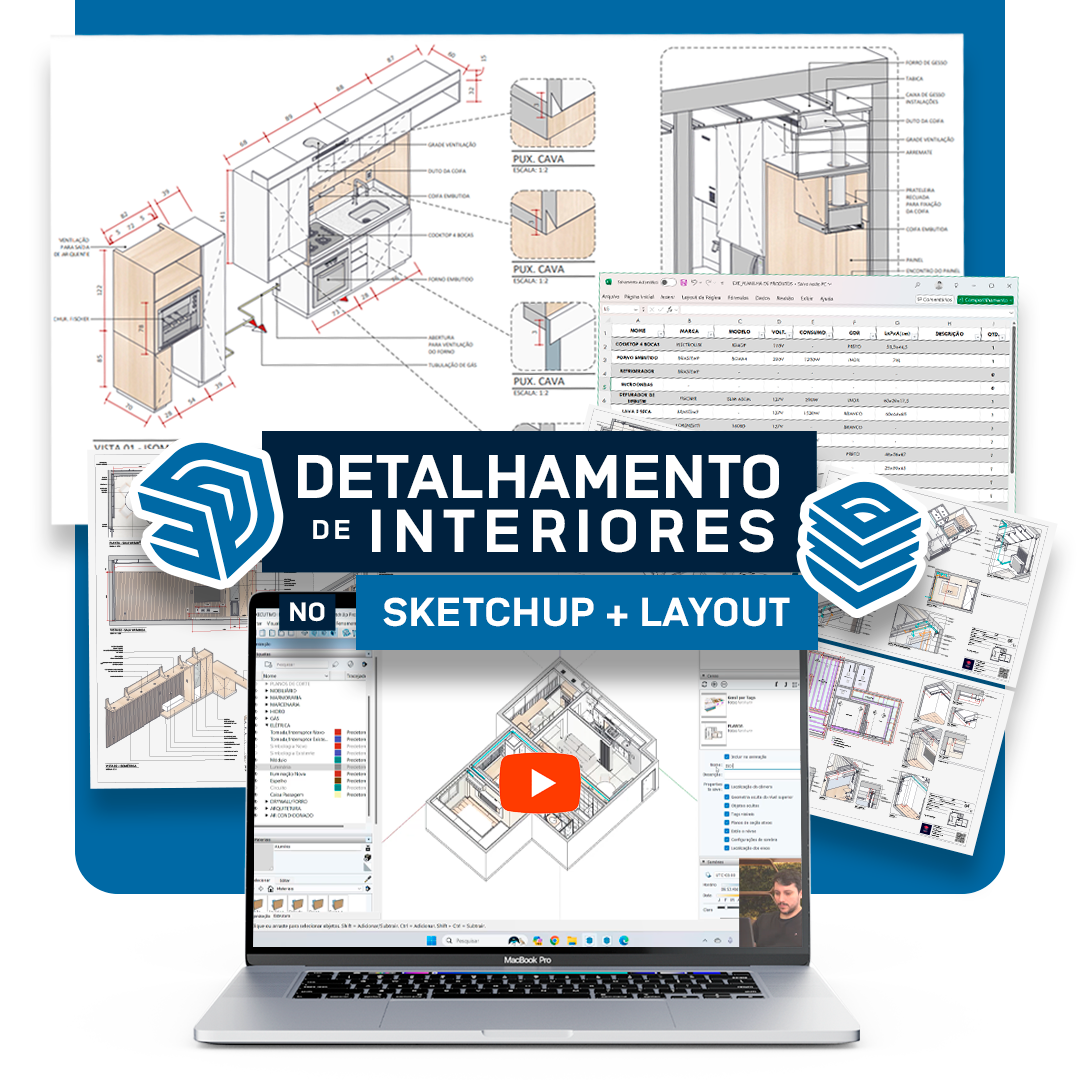


Interior Detailing Course in SketchUp + LayOut
- Immediate and Lifetime Access
- 100% Online with Certificate of Completion
- 20h of Content with Victor Gordeeff
In this course you will follow me in the construction of a real apartment model in Sketchup, from the construction of the walls, going through various elements of the project (coatings, painting, electrical appliances, furniture, lighting, ceiling, carpentry) until reaching the details and creating scenes and styles to export to Layout.
In Layout we will create documentation with plans, sections, isometric views and any details that are necessary for the correct execution of the project. You will learn how to create boards, stamps, model scenes, tables of quantities of elements, and how to control the graphic representation with the Labels and Styles of your file.
Files made available
- Base project for building the model (AutoCAD 2013 or newer)
- Basic Sketchup Template (Sketchup 2019 or newer)
- .GRT Report Templates (Sketchup 2019 or newer)
- Complete apartment design (Sketchup 2019 or newer)
- Basic Layout Template (Layout 2019 or newer)
- Completed apartment project (Layout 2019 or newer)
Available languages: Portuguese BR
Interior Detailing Course in SketchUp + LayOut


Model your 3D project in detail
In this course you will follow me in the construction of a real apartment model, from the construction of the walls, going through various elements of the project (coatings, painting, electrical appliances, furniture, lighting, ceiling, carpentry) until reaching the details and creating scenes and styles to export to Layout.
You will learn how to use the tools available within Components and Attributes to enter the necessary information for each element, and extract quantities for the executive project with the Generate Report tool.
All this without having to separate the environments by files, the entire apartment is worked on in just one file and without the need for plugins.
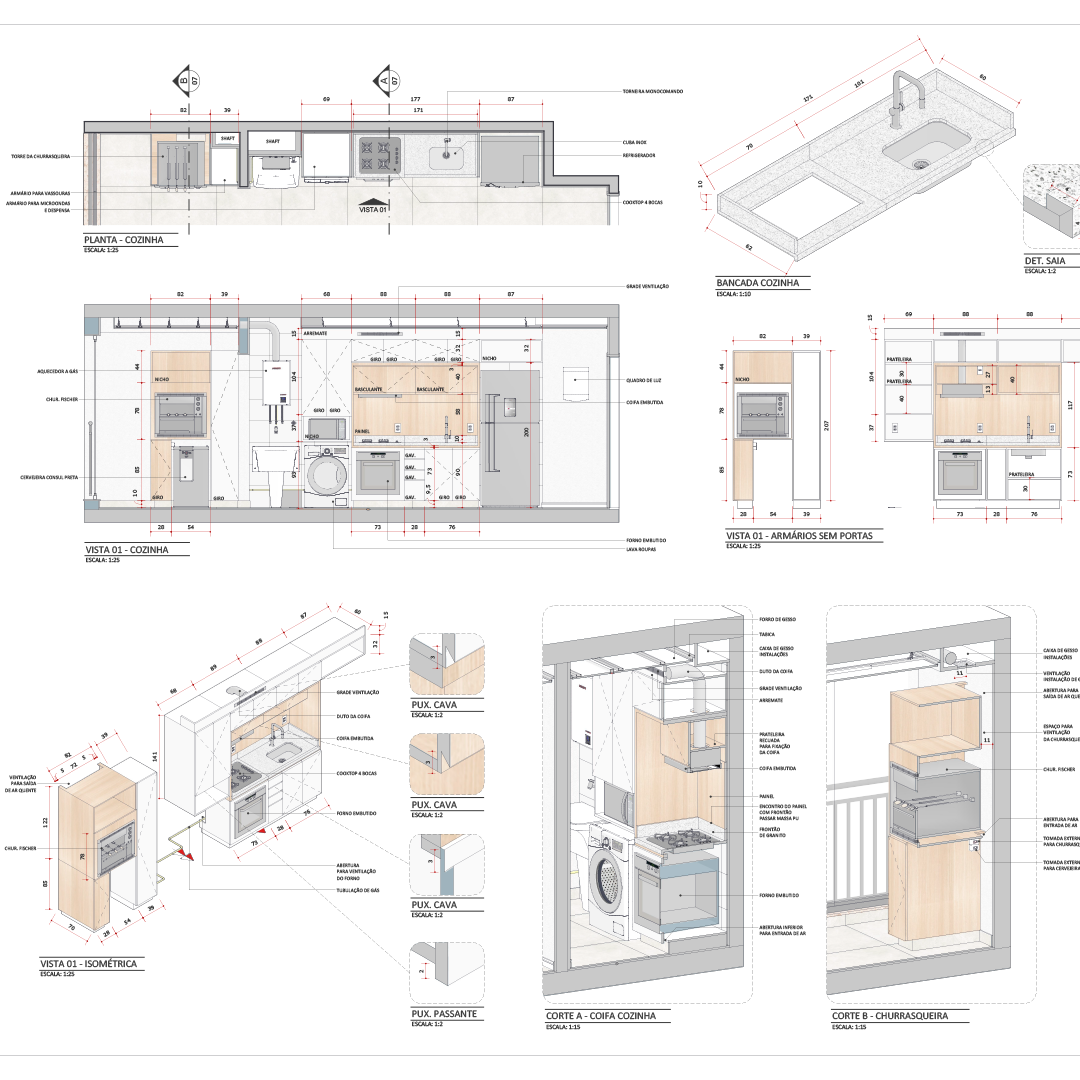
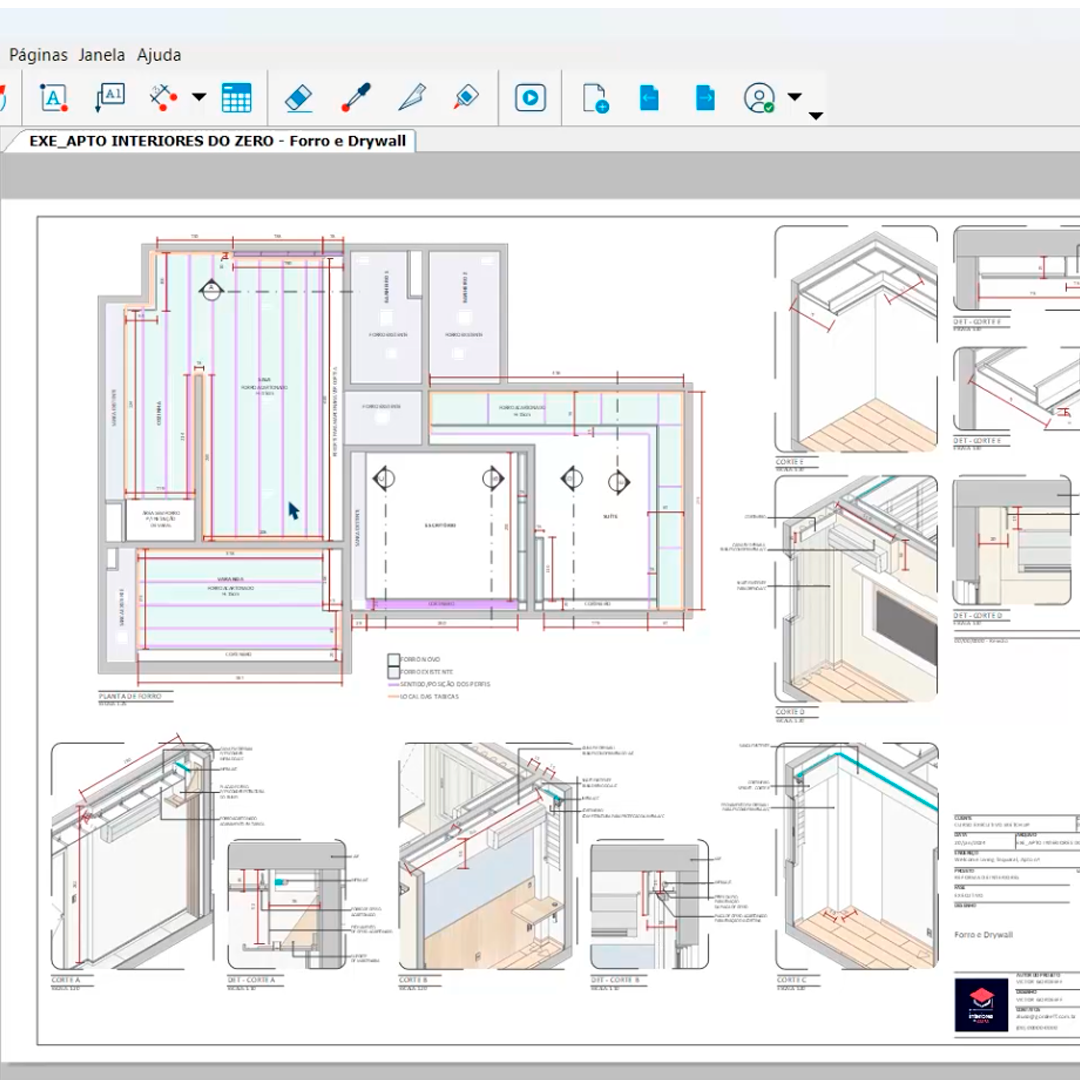
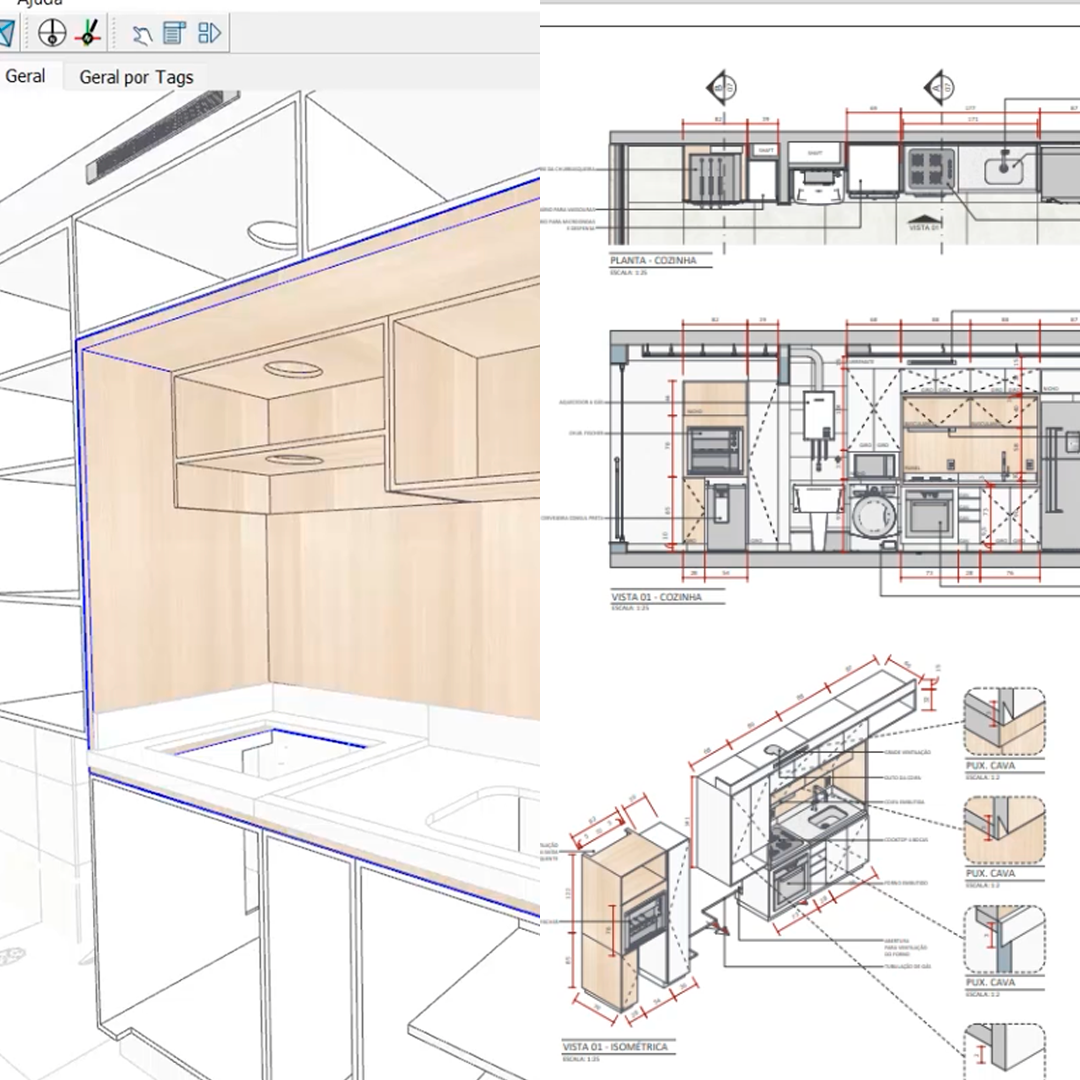
Documentation with plans, sections and details for the work
After detailed modeling of the project in SketchUp, within the Layout we will create documentation with plans, sections, isometrics and any details that are necessary for the correct execution of the project.
You will learn how to create boards, stamps, model scenes, tables of element quantities, and how to control the graphic representation with the Tags and Styles of your file.
More than 40 classes focused on executive design with Sketchup and Layout
Class 01 – Welcome
Initial instructions
Lesson 02 – SketchUP | Performance and style creation
Initial program settings to optimize appearance and performance. Explanation of styles and their impact on program performance.
Lesson 03 – SketchUP | Template File
Presentation of the template file that will be used to assemble the project in Sketchup.
Lesson 04 – SketchUP | Modeling slabs and walls
Modeling of the project's walls and slabs based on the project provided.
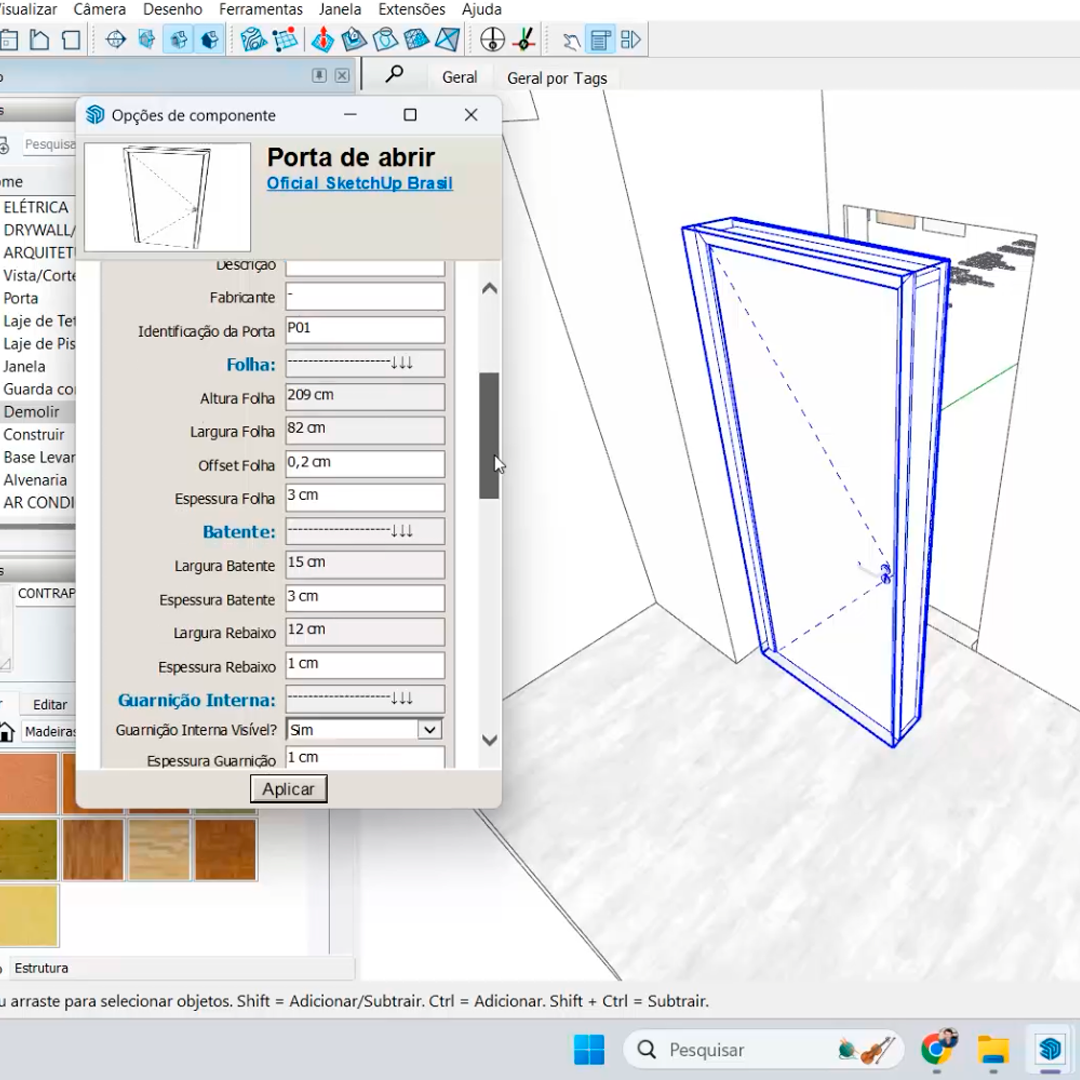
Lesson 05 – SketchUP | Doors and windows
Insertion of dynamic doors and windows.
Lesson 06 – SketchUP | Existing Coatings and Demolishing
Differentiation of coatings applied to walls and floors for renovation works.
Lesson 07 – SketchUP | New coatings area formula
Application of formula to flooring and covering components to calculate quantities.
Lesson 08 – SketchUP | Coatings report
Generation of reports with coating quantities.
Lesson 09 – SketchUP | Footers and Footer Report
Modeling of skirting boards and profiles, and generation of reports with quantities.
Lesson 10 – SketchUP | Countertops and sills
Modeling of countertops and sills and the use of labels to organize the elements.
Lesson 11 – SketchUP | Ceiling and moldings
Modeling of ceilings, moldings and other system elements. Use of labels for organization.
Lesson 12 – SketchUP | Air conditioning
Modeling of air conditioning system elements, and organization using labels.
Lesson 13 – SketchUP | Sockets and switches part 1
Explanation of socket and switch components.
Lesson 14 – SketchUP | Carpentry
Explanation on how to assemble carpentry elements, such as cabinets, cupboards and shelves, in a simple and practical way.
Lesson 15 – SketchUP | Sockets and switches part 2
Using labels to organize the project's switches and sockets.
Lesson 16 – SketchUP | Lighting and circuits
Explanation of lighting components and circuit modeling.
Lesson 17 – SketchUP | Painting and paint report
Application of painting materials and generation of quantity reports.
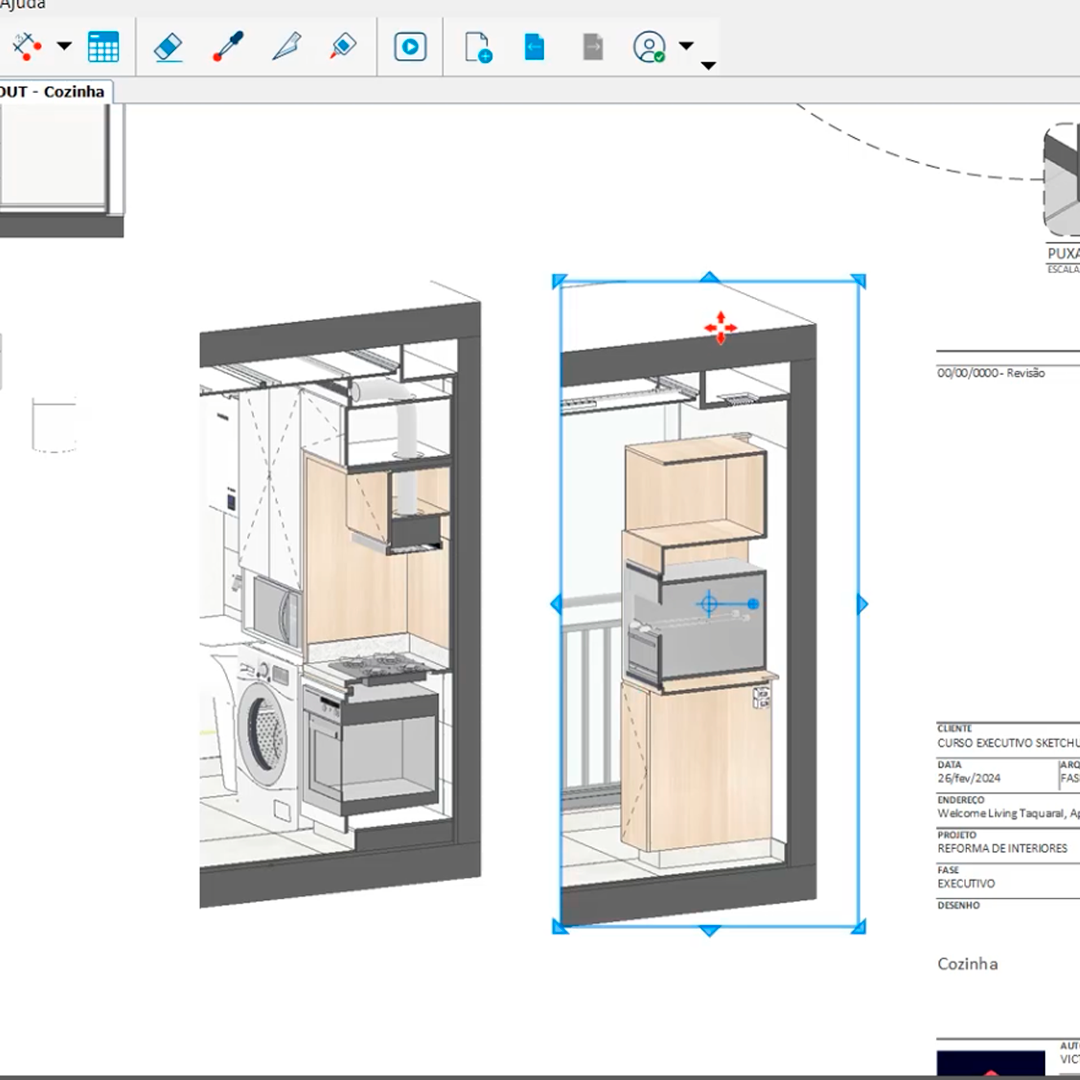
Lesson 18 – SketchUP | Furniture and appliances
Inserting furniture and appliance components correctly to generate a quantity report.
Lesson 19 – SketchUP | Metals and ceramics
Insertion of components, such as sinks, taps, toilets, in the correct way to generate a quantity report.
Lesson 20 – SketchUP | Cleaning the model
Cleaning unused elements from the Sketchup file to improve performance when exporting and using it in the Layout.
Lesson 21 – LayOut | Initial setup
Initial settings and customization of the Layout workspace.
Lesson 22 – LayOut | Pages, stamps and texts
Explanation of how to set up pages, texts and how to draw a stamp for the project sheet.
Lesson 23 – LayOut | Inserting images
Explanation of how to insert images into the project, for example photos or images of the company logo.
Lesson 24 – LayOut | Setting up the first viewport
Creating viewports and linking them to the Sketchup project file.
Lesson 25 – LayOut | Setting up plans and labels
Setting up a floor plan drawing, and how to use labels for customization.
Lesson 26 – LayOut | Isometrics and perspectives
Viewport configuration for creating perspective or isometric drawings.
Class 27 – LayOut | North and shadows
Setting shadows using Sketchup's Solar North tool.
Lesson 28 – LayOut | Text callouts
Creation of text callouts to specify drawing elements.
Lesson 29 – LayOut | Dimensions
Explanation of how it works and how to apply dimensions to your drawing.
Lesson 30 – LayOut | Customizing viewports
Customizing viewports through styles, and overlapping two or more viewports.
Lesson 31 – LayOut | Demolish/build plan
Configuring viewports for creating Demolish/Build plans for renovation works.
Class 32 – Layout | Electrical plan
Viewport configuration for creating electrical plans and circuits.
Lesson 33 – LayOut | Ceiling plan
Viewport configuration for creating ceiling plans.
Lesson 34 – LayOut | Lining details
Viewport configuration for creating details.
Lesson 35 – Layout | Floor plan and skirting board
Viewport configuration for creating floor plans and footers.
Class 36 – LayOut | Air conditioning plant
Viewport configuration for creating air conditioning system plans.
Lesson 37 – LayOut | Air conditioning details
Viewport configuration for creating details.
Class 38 – LayOut | Environments and carpentry
Viewport configuration for creating air conditioning system details.
Lesson 39 – LayOut | Carpentry details
Viewport configuration for creating cabinet details.
Lesson 40 – LayOut | Marble details
Viewport configuration for creating countertop and sill details.
Lesson 41 – LayOut | Electrical details
Viewport configuration for creating built-in appliance details.
Lesson 42 – LayOut | Reports and captions
Importing quantity reports and configuring tables.
Class 43 – LayOut | Templates and scrapbooks
Use of templates and albums to speed up drawings.
Lesson 44 – LayOut | Exporting PDF and a challenge
Explanation of how to export sheets in PDF.
Learn step by step

Modeling

Styles and Labels

Documentation
Files you will have access to


Victor Gordeeff
Architect and professor, I graduated in Architecture and Urbanism from Puc Campinas since 2012.
I'm passionate about projects, but nothing compares to the pleasure I have in teaching architecture and interior design professionals everything they don't learn about the real job market.